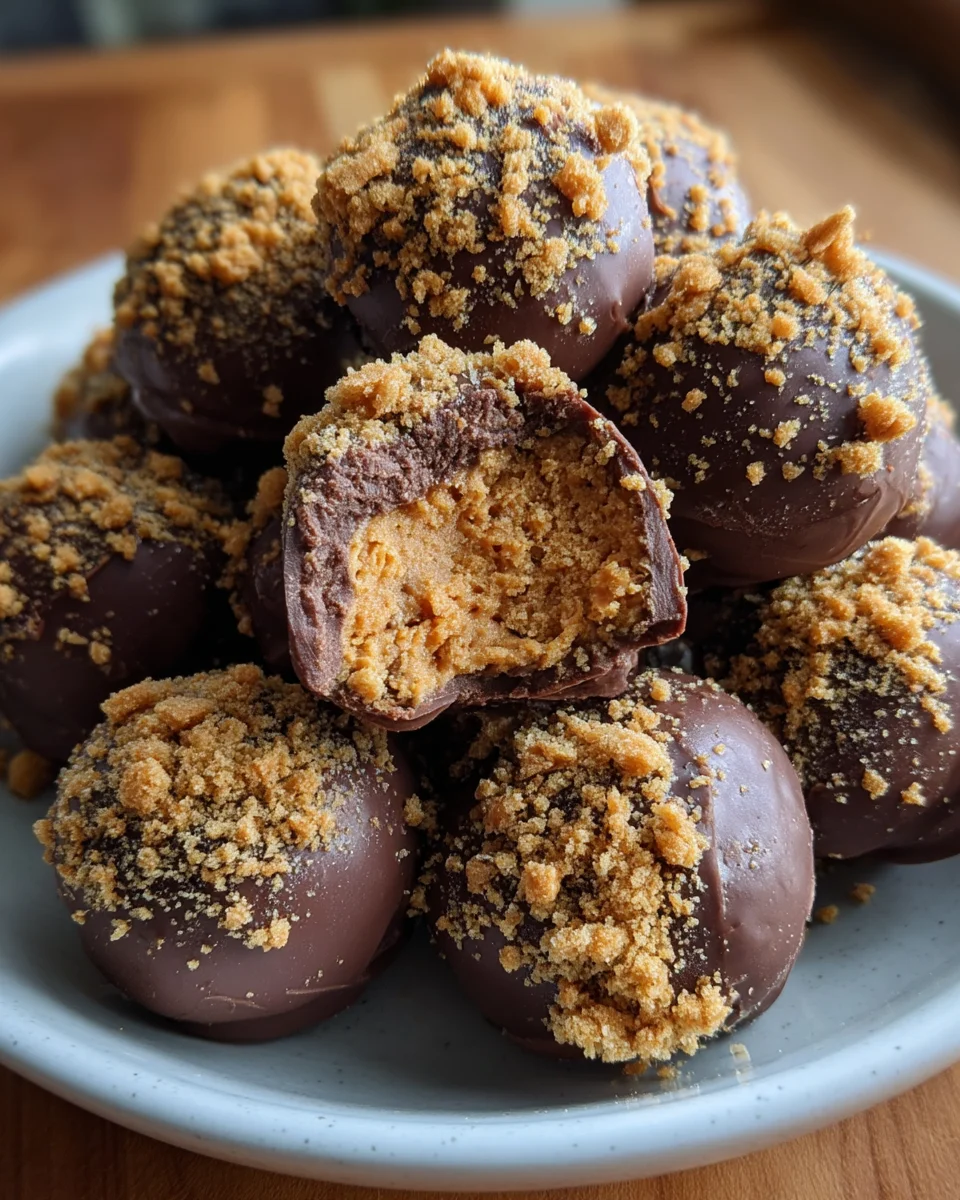
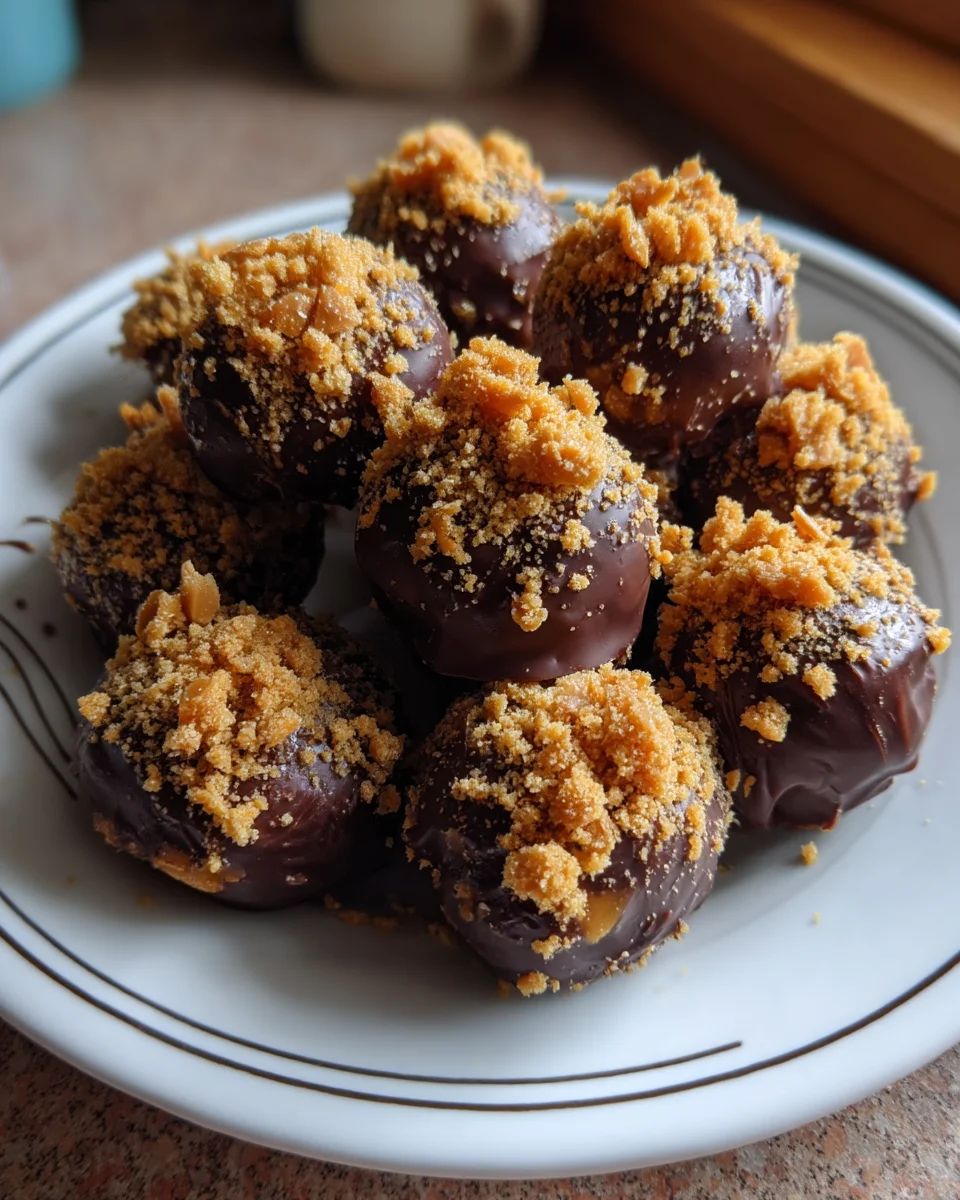
Butterfinger Balls
Butterfinger Balls are a delightful treat that bring together creamy peanut butter and crunchy textures, making them perfect for any occasion. These sweet, no-bake confections are great for parties, family gatherings, or even as a simple dessert at home. With their rich flavors and easy preparation, Butterfinger Balls are sure to be a hit with everyone.
Why You’ll Love This Recipe
- Quick and Easy: With minimal ingredients and no baking required, you can whip these up in no time.
- Perfectly Sweet: The combination of peanut butter and chocolate creates a deliciously satisfying treat.
- Customizable: Feel free to add your favorite toppings or adjust the sweetness level to suit your taste.
- Kid-Friendly: This recipe is fun for kids to help with—rolling the balls is always a hit!
- Versatile Treats: Great for holidays, birthdays, or just because; these treats fit any occasion.
Tools and Preparation
To make Butterfinger Balls successfully, you’ll need a few essential tools. Having the right equipment will streamline your process and ensure your treats turn out perfectly.
Essential Tools and Equipment
- Mixing bowl
- Cookie sheet
- Parchment paper
- Microwave-safe bowl
- Spoon or spatula
Importance of Each Tool
- Mixing bowl: Essential for combining your ingredients evenly.
- Cookie sheet: Provides a stable surface to chill your Butterfinger Balls after forming them.
- Parchment paper: Prevents sticking and makes cleanup a breeze.
- Microwave-safe bowl: Ideal for melting chocolate without any risk of burning.
Ingredients
For the Butterfinger Balls
- 1 cup creamy peanut butter
- 1 cup confectioners’ sugar
- 1 ½ cups crushed graham crackers
- 1 teaspoon vanilla extract
For the Coating
- 2 cups milk chocolate chips
- 1 tablespoon vegetable oil
How to Make Butterfinger Balls
Step 1: Prepare the Mixture
In a mixing bowl, combine the following:
1. 1 cup creamy peanut butter
2. 1 cup confectioners’ sugar
3. 1 ½ cups crushed graham crackers
4. 1 teaspoon vanilla extract
Mix until fully combined and the mixture holds together well.
Step 2: Form the Balls
Using your hands, scoop out about 1 tablespoon of the mixture.
– Roll it into a ball shape.
– Place each ball on a cookie sheet lined with parchment paper.
Repeat until all mixture is used up.
Step 3: Melt the Chocolate Coating
In a microwave-safe bowl, combine:
1. 2 cups milk chocolate chips
2. 1 tablespoon vegetable oil
- Microwave in 30-second intervals, stirring between each interval until melted and smooth.
Step 4: Coat the Balls
Dip each peanut butter ball into the melted chocolate mixture.
– Use a fork to lift it out, allowing excess chocolate to drip off.
– Return coated balls to the parchment-lined cookie sheet.
Step 5: Chill and Serve
Place the cookie sheet in the refrigerator for about 30 minutes or until the chocolate has set. Once set, serve them up as an irresistible treat!
How to Serve Butterfinger Balls
Butterfinger Balls are a delightful treat that can be enjoyed in various ways. Whether you’re hosting a party or just indulging your sweet tooth, here are some creative serving suggestions.
Individual Treats
- Serve each Butterfinger Ball in a small cupcake liner for an easy grab-and-go option.
Dessert Platters
- Arrange Butterfinger Balls on a platter with other desserts like brownies and cookies for a colorful display.
Party Favors
- Package Butterfinger Balls in clear bags tied with ribbon to give as party favors. They make a sweet takeaway!
Ice Cream Topping
- Crush Butterfinger Balls to use as an ice cream topping, adding a crunchy texture and delicious flavor.
Coffee Pairing
- Serve Butterfinger Balls alongside coffee or hot chocolate for the perfect afternoon treat.
How to Perfect Butterfinger Balls
Perfecting Butterfinger Balls is all about balance and technique. Here are some tips to ensure your treats turn out amazing every time.
- Use fresh ingredients: Ensure your peanut butter is creamy and not too dry; this helps bind the mixture together effectively.
- Chill before rolling: Refrigerate the mixture for at least 30 minutes before rolling into balls. This makes them easier to handle.
- Coat thoroughly: When dipping in chocolate, make sure to fully coat each ball for an even chocolate layer.
- Add a pinch of salt: Mixing in 1/4 teaspoon of sea salt enhances the sweetness and brings out the flavors beautifully.
- Storage matters: Keep your Butterfinger Balls in an airtight container in the fridge to maintain freshness for up to one week.
- Experiment with toppings: Try adding crushed nuts or sprinkles on top of the chocolate coating for extra texture and visual appeal.
Best Side Dishes for Butterfinger Balls
While Butterfinger Balls are delicious on their own, pairing them with complementary side dishes can enhance your dessert experience. Here are some great options:
- Vanilla Ice Cream: A classic pairing that adds creaminess and balances the sweetness of the balls.
- Chocolate Sauce: Drizzle warm chocolate sauce over the balls for an indulgent touch.
- Fresh Fruit Salad: A mix of berries and melon provides a refreshing contrast to the rich flavors of the Butterfinger Balls.
- Pecan Pie Bites: These mini desserts offer a nutty, caramel note that pairs well with Butterfinger’s flavors.
- Cheesecake Bites: Small portions of cheesecake provide a creamy finish alongside the crunch of Butterfinger Balls.
- Coffee or Espresso: The bitterness of coffee complements the sweetness, making it an excellent drink option to serve alongside.
Common Mistakes to Avoid
Making Butterfinger Balls can be simple, but there are common pitfalls to watch out for.
- Using the wrong peanut butter – Stick with creamy peanut butter (about 1 cup) for the best texture. Chunky peanut butter can make it hard to form balls.
- Not chilling the mixture – After mixing your ingredients, refrigerate for at least 30 minutes. This helps the balls hold their shape better.
- Skipping the chocolate coating – Don’t forget to coat your balls in melted chocolate (8 ounces). It adds flavor and is essential for that classic Butterfinger taste.
- Overmixing the ingredients – Mix just until combined; overmixing can result in a tough texture. Aim for about 30 seconds of mixing.
- Incorrectly measuring powdered sugar – Use precisely 2 cups of powdered sugar. Too much can make your mixture too sweet or dry.
Storage & Reheating Instructions
Refrigerator Storage
- Store Butterfinger Balls in an airtight container.
- They can last up to 1 week in the refrigerator.
- Keep them separated with parchment paper if stacking.
Freezing Butterfinger Balls
- Place Butterfinger Balls in a freezer-safe container or bag.
- They will stay fresh for up to 3 months when frozen.
- Label the container with the date you froze them for easy tracking.
Reheating Butterfinger Balls
- Oven – Preheat to 350°F (175°C) and warm for about 5-7 minutes. This keeps them from becoming too soft.
- Microwave – Heat on low power for around 10-15 seconds. Check frequently to avoid melting too much.
- Stovetop – Place on low heat in a non-stick skillet, turning occasionally, for about 5 minutes until warmed through.
Frequently Asked Questions
What are Butterfinger Balls?
Butterfinger Balls are no-bake treats made from a mixture of crushed graham crackers, peanut butter, and powdered sugar, coated in chocolate.
How do I make my Butterfinger Balls firmer?
Ensure you chill the mixture for at least 30 minutes before forming balls. This helps them hold their shape better.
Can I customize my Butterfinger Balls?
Absolutely! You can add crushed nuts (about 1/2 cup) or swap out chocolate for white chocolate as a coating.
How many servings does this recipe yield?
This recipe typically makes about 24 Butterfinger Balls, perfect for sharing at parties or gatherings.
Are Butterfinger Balls gluten-free?
You can make them gluten-free by using gluten-free graham crackers and ensuring all other ingredients are certified gluten-free.
Final Thoughts
Butterfinger Balls are a delightful treat that combines sweet and salty flavors in a fun bite-sized form. Their versatility allows for various customization options, making them perfect for any occasion. Give this recipe a try, and enjoy creating your own delicious variations!
Butterfinger Balls

Butterfinger Balls are a delightful, no-bake treat that combines the creamy richness of peanut butter with the crunchiness of graham crackers and a chocolate coating. Quick and easy to make, these bite-sized snacks are perfect for parties, family gatherings, or simply indulging your sweet tooth at home. With just a handful of ingredients, you can whip up a batch that everyone will adore. Customize them with your favorite toppings or enjoy them as is—either way, they’re sure to satisfy!
- Prep Time: 20 minutes
- Cook Time: 0 minutes
- Total Time: 20 minutes
- Yield: Approximately 24 servings 1x
- Category: Dessert
- Method: No-bake
- Cuisine: American
Ingredients
- 1 cup creamy peanut butter
- 1 cup confectioners' sugar
- 1 ½ cups crushed graham crackers
- 1 teaspoon vanilla extract
- 2 cups milk chocolate chips
- 1 tablespoon vegetable oil
Instructions
- In a mixing bowl, combine the peanut butter, confectioners' sugar, crushed graham crackers, and vanilla extract. Mix until fully combined.
- Scoop about 1 tablespoon of the mixture and roll it into a ball shape. Place each ball on a cookie sheet lined with parchment paper.
- In a microwave-safe bowl, melt the chocolate chips and vegetable oil in 30-second intervals, stirring until smooth.
- Dip each ball into the melted chocolate using a fork, allowing excess chocolate to drip off before returning them to the cookie sheet.
- Refrigerate for about 30 minutes until the chocolate sets.
Nutrition
- Serving Size: 1 Butterfinger Ball (25g)
- Calories: 100
- Sugar: 7g
- Sodium: 50mg
- Fat: 6g
- Saturated Fat: 2g
- Unsaturated Fat: 4g
- Trans Fat: 0g
- Carbohydrates: 10g
- Fiber: 0g
- Protein: 2g
- Cholesterol: 0mg