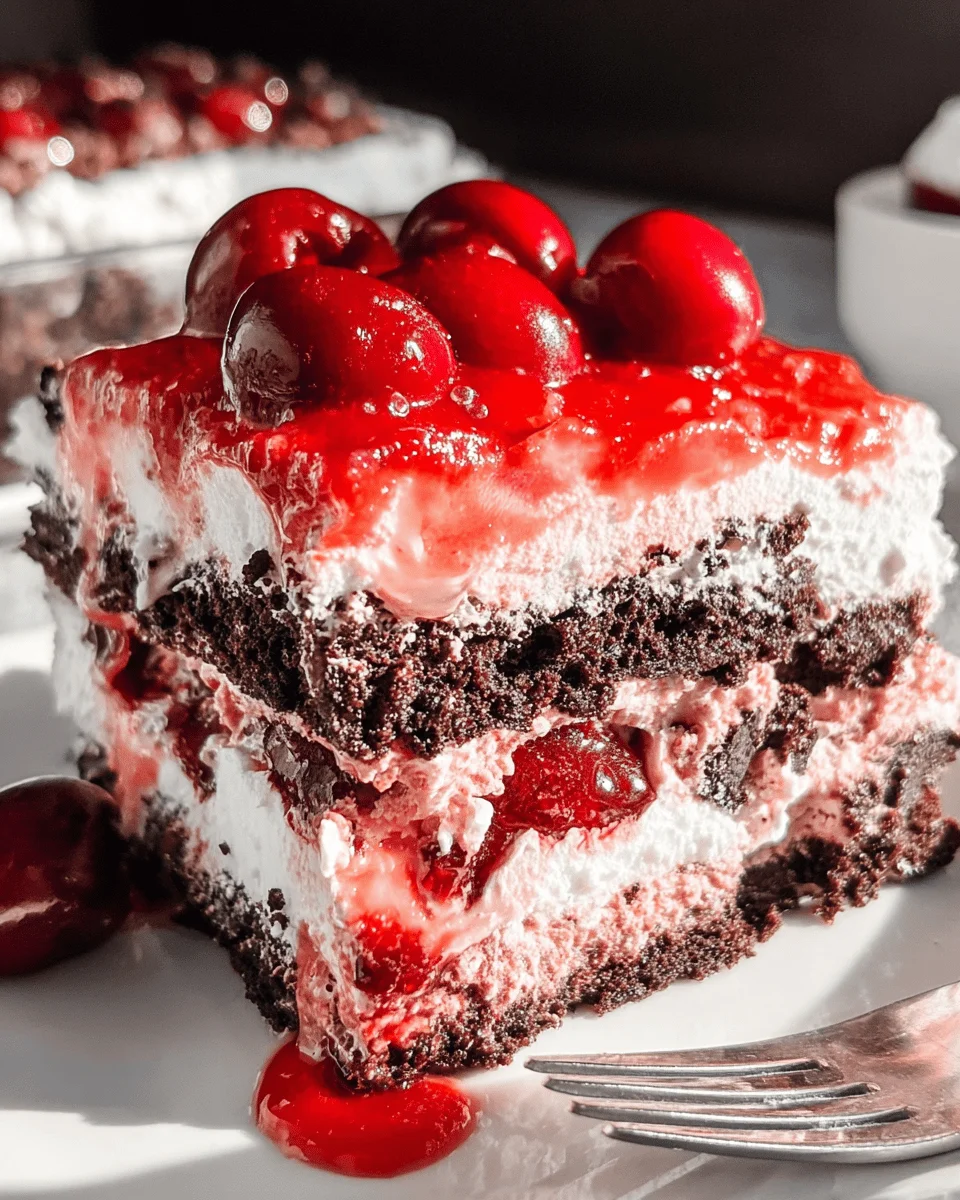
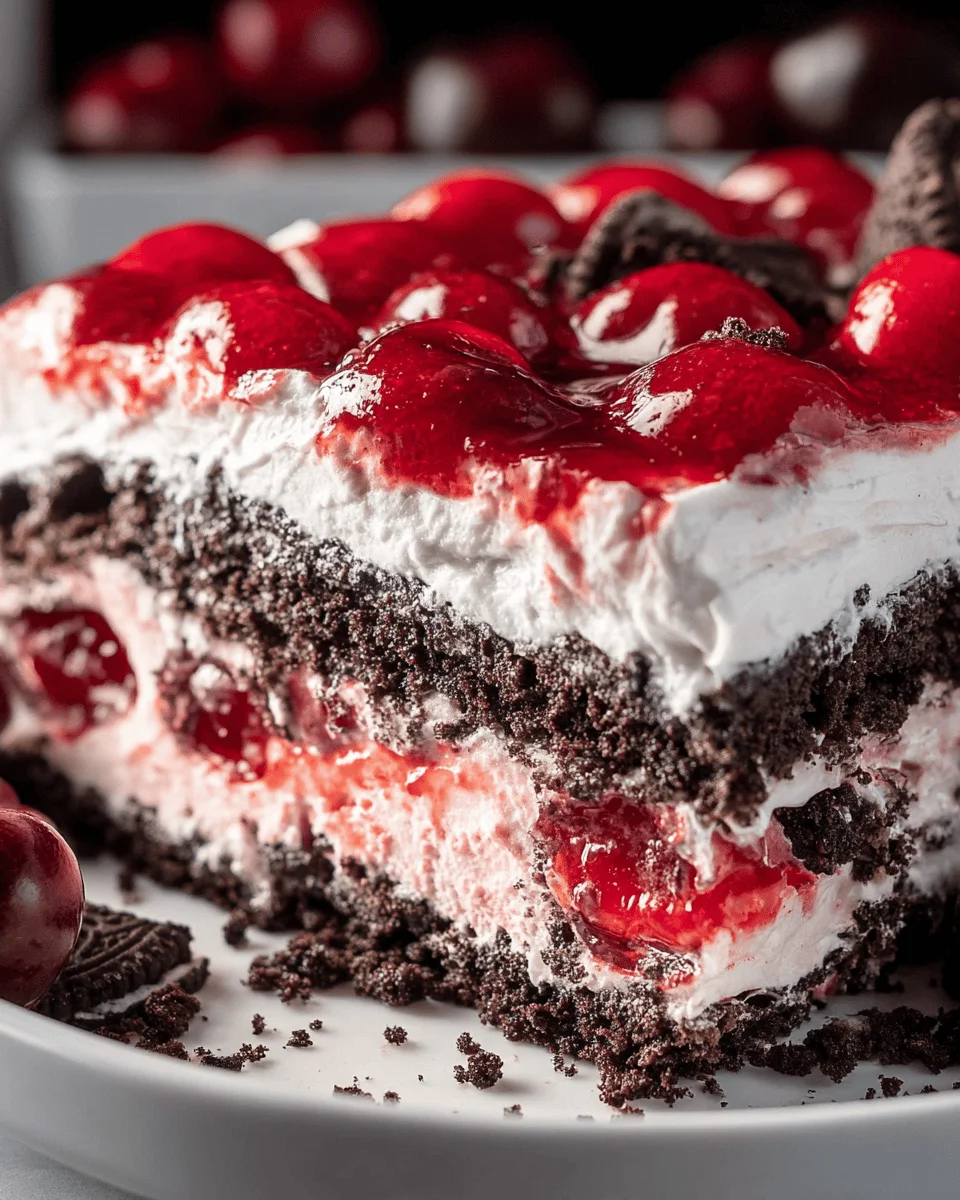
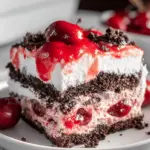
Black Forest Icebox Cake
A Black Forest Icebox Cake is a delightful and indulgent treat that combines layers of creamy goodness with the rich flavors of chocolate and cherry. This no-bake dessert is perfect for any occasion, from family gatherings to summer barbecues. Its unique combination of Oreo cookies, cream cheese, and cherry pie filling makes it a standout dish that will impress your guests and satisfy your sweet tooth. Plus, it’s incredibly easy to prepare, requiring minimal effort while delivering maximum flavor.
Why You’ll Love This Recipe
- No-Bake Convenience: This cake requires no baking, making it an effortless dessert option for anyone short on time.
- Decadent Layers: The combination of creamy filling and crunchy Oreos creates a satisfying texture contrast in every bite.
- Versatile Serving Options: Perfect for parties, potlucks, or just a cozy night in, this cake suits any occasion.
- Kid-Friendly: With its sweet flavors and fun layers, children will love helping to assemble this treat.
- Make Ahead Friendly: Prepare it a day in advance for a hassle-free dessert that’s ready when you are.
Tools and Preparation
To create your Black Forest Icebox Cake, you’ll need some essential kitchen tools that make the process smooth and enjoyable.
Essential Kitchen Tools
- Stand mixer or handheld mixer
- Mixing bowl
- Offset spatula
- 9×9 baking dish
Why These Tools Matter
- Stand mixer or handheld mixer: These tools ensure your cream cheese mixture is perfectly smooth without lumps.
- Mixing bowl: A good mixing bowl allows for easy folding of ingredients without spills.
- Offset spatula: This tool helps spread layers evenly for that professional look.
- 9×9 baking dish: The right size ensures all your layers fit perfectly without overflowing.
Ingredients
A Black Forest Icebox Cake is a quick and easy way to create a no-bake, decadent layered dessert. Made with Oreo cookies, cream cheese, and cherry pie filling, it’s a refreshing change from the classic chocolate cherry cake.
- 8 ounce package of cream cheese (softened to room temperature)
- 5 tablespoons granulated sugar
- ½ teaspoon pure almond extract
- ¼ teaspoon pure vanilla extract
- 42 ounce (2 21-ounce) cans of cherry pie filling (divided into 1¼ cups and remainder)
- 16 ounce (2 8-ounce) containers of whipped topping (thawed, divided into 3 cups, ¼ cup, and remainder)
- 50 chocolate Oreo cookies (Oreo brand or store brand. A family-size package contains 39 cookies)
- ⅔ cup whole milk
How to Make Black Forest Icebox Cake
Step 1: Prepare the Cream Cheese Mixture
Using either a stand mixer or a medium-sized mixing bowl and a handheld mixer on medium-high speed:
1. Beat together the cream cheese, granulated sugar, almond extract, and vanilla extract for 1½–2 minutes until completely incorporated and smooth.
Step 2: Add Cherry Filling
- Fold in 1¼ cups of the cherry pie filling into the cream cheese mixture until well combined.
Step 3: Incorporate Whipped Topping
- Gently fold in 3 cups of thawed whipped topping. Set aside this mixture for layering later.
Step 4: Create the Base Layer
- Spread ¼ cup of the thawed whipped topping in the bottom of a 9×9 baking dish.
Step 5: Layer the Oreos
- Dip half of the chocolate Oreos, one at a time, into the whole milk.
- Line the dipped cookies on top of the bottom layer of whipped topping to form an even base.
Step 6: Add Cream Cheese Layer
- Use an offset spatula to spread half of the cream cheese cherry mixture over the layer of Oreos.
Step 7: Repeat Oreo Layer
- Repeat dipping remaining Oreos in milk and layer them on top of the cream cheese mixture.
Step 8: Final Cream Cheese Layer
- Evenly spread the remaining half of the cream cheese mixture over this second layer of Oreos.
Step 9: Top with Whipped Topping
- Spread any remaining whipped topping evenly over the top layer.
- Cover and chill in the refrigerator for at least six hours or overnight for best results.
- Just before serving, spread any remaining cherry pie filling on top of the whipped topping layer.
- Slice into squares (4 slices x 3 slices) and serve immediately.
Enjoy your delicious Black Forest Icebox Cake!
How to Serve Black Forest Icebox Cake
Serving Black Forest Icebox Cake is a delightful experience that can enhance any gathering or special occasion. Here are some creative ways to present this delicious dessert.
Individual Portions
- Use small dessert cups or ramekins to serve individual portions of the cake, making it easy for guests to enjoy without needing to slice the cake.
Garnished Slices
- Top each slice with additional cherry pie filling, whipped topping, and a sprinkle of chocolate shavings for an elegant touch.
Layered Trifle
- For a fun twist, layer the ingredients in a glass trifle dish instead of a baking dish. This will showcase the beautiful layers and colors of the cake.
Frozen Treats
- Freeze the assembled icebox cake and slice it into frozen treats. Serve on hot summer days for a refreshing dessert option.
Cake Pops
- Turn leftover pieces into cake pops by crumbling them and mixing with whipped topping, then rolling into balls and dipping in chocolate coating.
Miniature Cakes
- Create mini versions using cupcake liners and small amounts of each layer. This makes for adorable party favors or treats for kids.
How to Perfect Black Forest Icebox Cake
To make your Black Forest Icebox Cake truly exceptional, follow these helpful tips.
- Use high-quality ingredients: Opt for fresh cherries or premium cherry pie filling to elevate the flavors in your dessert.
- Let it chill: Allow the cake to chill overnight. This helps all layers meld together beautifully and enhances the flavor.
- Experiment with flavors: Feel free to swap in different extracts like vanilla or coconut to change up the flavor profile slightly.
- Be gentle when folding: Carefully incorporate whipped topping into your mixture; this preserves the lightness and creaminess of your filling.
- Add a crunch: Consider adding crushed nuts or chocolate chips between layers for added texture and flavor contrast.
- Serve with flair: Present with fresh cherries or mint leaves on top for a pop of color and freshness that complements the rich flavors.
Best Side Dishes for Black Forest Icebox Cake
Pairing side dishes with your Black Forest Icebox Cake can create a well-rounded meal. Here are some tasty options:
- Fruit Salad: A refreshing mix of seasonal fruits adds brightness and balances the sweetness of the cake.
- Chocolate Mousse: Rich chocolate mousse can create a luxurious experience alongside your icebox cake.
- Coffee or Espresso: A strong cup of coffee can enhance the chocolate flavors and provide a nice contrast.
- Vanilla Ice Cream: Creamy vanilla ice cream complements the cake’s richness while adding an extra layer of delight.
- Cheese Platter: A selection of mild cheeses pairs nicely with sweet desserts, offering varied textures and flavors.
- Pecan Pie Bars: These sweet bars provide another layer of indulgence without overwhelming sweetness next to the icebox cake.
- Berries with Whipped Cream: Fresh berries topped with whipped cream bring lightness that works wonderfully after rich desserts.
- Mint Tea: A soothing herbal tea can cleanse the palate after enjoying slices of this decadent treat.
Common Mistakes to Avoid
When making a Black Forest Icebox Cake, it’s easy to overlook some key steps. Avoid these common pitfalls to ensure your dessert turns out perfectly.
- Incorrect Cream Cheese Consistency: Using cream cheese that’s too cold can lead to lumps. Always soften it to room temperature for a smooth mixture.
- Overmixing Ingredients: Mixing the cream cheese and whipped topping too much can deflate the whipped topping. Fold gently to keep the light texture.
- Insufficient Chilling Time: Rushing the chilling process can make your cake unstable. Aim for at least 6 hours, or overnight for best results.
- Skipping Layering Steps: Not following the layering instructions can affect both flavor and presentation. Make sure to layer as directed for a beautiful finish.
- Ignoring Serving Temperature: Serving the cake too cold might mask its flavors. Allow it to sit for a few minutes after removing from the fridge before slicing.
Refrigerator Storage
- Store your Black Forest Icebox Cake in an airtight container for up to 3 days.
- Keep it refrigerated at all times to maintain freshness and prevent spoilage.
Freezing Black Forest Icebox Cake
- You can freeze portions of the cake for up to 2 months if needed.
- Wrap slices tightly in plastic wrap, then place them in a freezer-safe container.
Reheating Black Forest Icebox Cake
- Oven: It’s not recommended to reheat this dessert in the oven as it may alter its creamy texture.
- Microwave: If necessary, microwave individual slices on low power for about 10-15 seconds.
- Stovetop: This method is not suitable as it could cause melting and mess.
Frequently Asked Questions
What is a Black Forest Icebox Cake?
A Black Forest Icebox Cake is a no-bake dessert featuring layers of cookies, cream cheese, whipped topping, and cherry filling, perfect for warm weather.
How long does it take to prepare a Black Forest Icebox Cake?
Preparation takes about 20 minutes, but chilling time requires at least 6 hours or overnight for optimal texture and flavor.
Can I customize my Black Forest Icebox Cake?
Absolutely! Feel free to add different fruits or swap out cookies for other flavors like chocolate chip or vanilla wafers.
How do I store leftovers of my Black Forest Icebox Cake?
Keep leftover cake in an airtight container in the refrigerator for up to 3 days. You can also freeze individual slices for later enjoyment.
Conclusion
The Black Forest Icebox Cake is an easy yet indulgent dessert that’s perfect for any occasion. Its versatility allows you to customize flavors while enjoying a delightful blend of creamy and fruity layers. Don’t hesitate to try this recipe and make it your own!
Black Forest Icebox Cake
Indulge in the creamy layers of a delightful Black Forest Icebox Cake, an effortless no-bake dessert perfect for any occasion. This refreshing treat features rich chocolate cookies paired with a luscious cream cheese and cherry filling, making it a crowd-pleaser at family gatherings or summer parties. With its combination of flavors and textures, this cake is easy to prepare and can be made ahead of time for a hassle-free sweet finish to your meal. Whether you’re serving it as a show-stopping centerpiece or as individual portions, your guests will be enchanted by the layers of flavor and the delightful presentation.
- Prep Time: 20 minutes
- Cook Time: None
- Total Time: 0 hours
- Yield: Serves approximately 12 1x
- Category: Dessert
- Method: No-Bake
- Cuisine: American
Ingredients
- 8 ounces cream cheese (softened)
- 5 tablespoons granulated sugar
- ½ teaspoon pure almond extract
- ¼ teaspoon pure vanilla extract
- 42 ounces cherry pie filling (divided)
- 16 ounces whipped topping (thawed)
- 50 chocolate sandwich cookies
- ⅔ cup whole milk
Instructions
- In a mixing bowl, beat cream cheese, sugar, almond extract, and vanilla until smooth.
- Fold in 1¼ cups cherry pie filling into the cream cheese mixture.
- Gently mix in 3 cups of whipped topping until combined.
- Spread ¼ cup whipped topping in a 9×9 baking dish.
- Dip half of the cookies in milk and layer them over the whipped topping.
- Spread half of the cream cheese mixture on top of the cookies.
- Repeat with remaining cookies and finish with the rest of the cream cheese mixture.
- Top with remaining whipped topping and chill for at least six hours or overnight.
- Before serving, add more cherry pie filling on top.
Nutrition
- Serving Size: 1 slice (approximately 120g)
- Calories: 300
- Sugar: 22g
- Sodium: 200mg
- Fat: 18g
- Saturated Fat: 10g
- Unsaturated Fat: 6g
- Trans Fat: 0g
- Carbohydrates: 32g
- Fiber: 1g
- Protein: 3g
- Cholesterol: 30mg